LDCloud
Recharge
SALE
English
How to add and bind a proxy IP
Update Time:2026-03-20 16:23:59
The new LDCloud client now supports cloud device IP proxy binding. Only static SOCKS5 and HTTP(S) IPs are supported for now; dynamic IP functionality will be rolled out in a future update.
Recommended: Direct Platform Purchase
Follow the links below to view port operation instructions if you need to subscribe to an IP proxy service:
1:Mobile IP Proxy Purchase Process (tap to view details)
2:PC IP Proxy Purchase Process (tap to view details)
If you have already purchased IP proxy services from other third-party platforms, you can follow the instructions below to add and bind them to your cloud phone device.
IP Proxy Add/Bind Steps
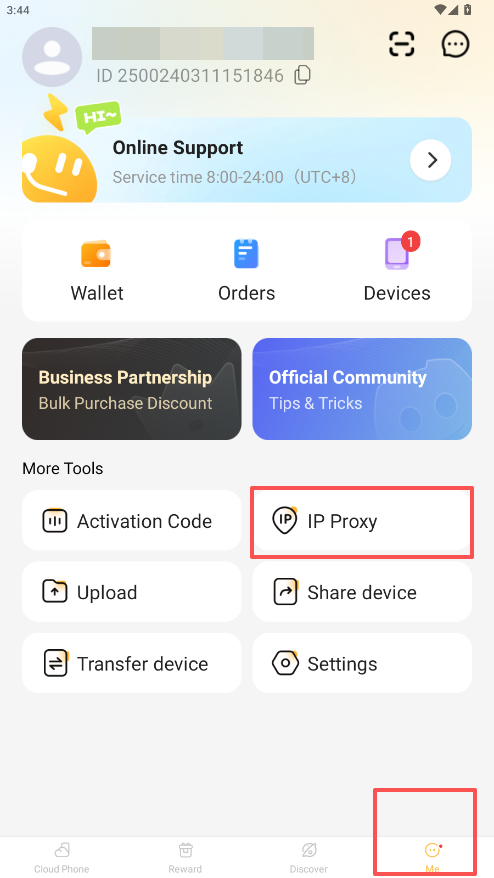
1:Launch the LDCloud client, go to the Mine tab and locate the IP Proxy entry.
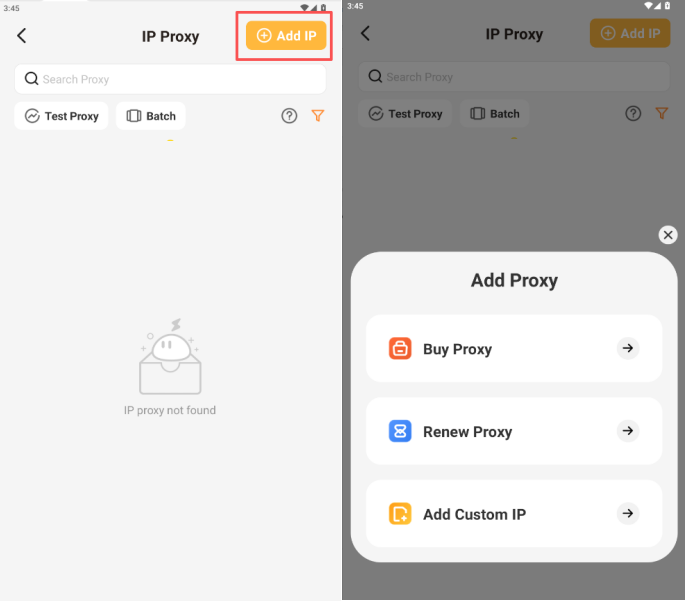
2:On the IP Proxy page, tap Add IP in the top-right corner. Three options will be available:
- Buy Proxy: Purchase official proxy IPs provided by LDCloud
- Renew Proxy: Extend the validity of your existing LDCloud official IPs
- Add Custom IP: Enter proxy credentials for IPs purchased from third-party vendors
2.1 Bind Third-Party Custom IPs
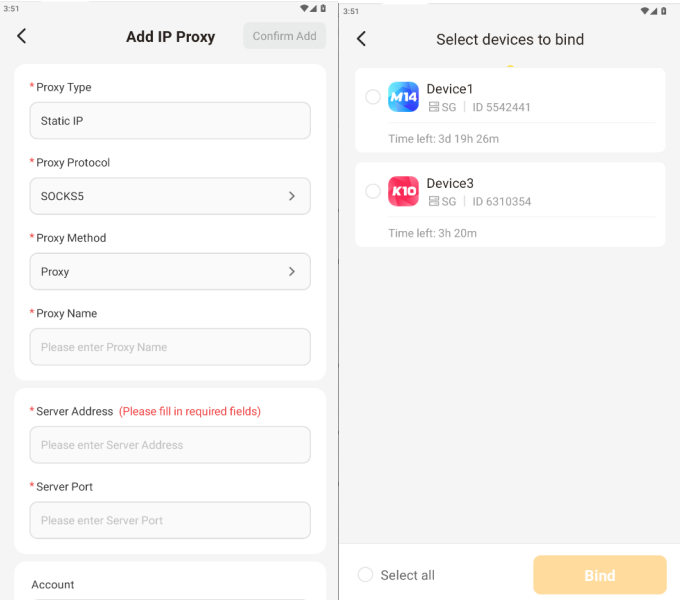
If your proxy IP is sourced from another platform, select Add Custom IP and fill in all required proxy parameters as prompted.
Note: Only static SOCKS5 and HTTP(S) IPs are compatible at present. Dynamic IP support will arrive in a later version.
Cloud devices from older batches require a restart after binding for changes to take effect.
Once all information is filled out, tap Bind and select the corresponding cloud device to finish setup.
3:Bulk Binding (Multiple IPs / Multiple Devices)
If you own multiple proxy IPs, use the bulk binding sidebar tool. Select multiple cloud devices and IPs in one go, and the system will automatically assign and bind them in batches.
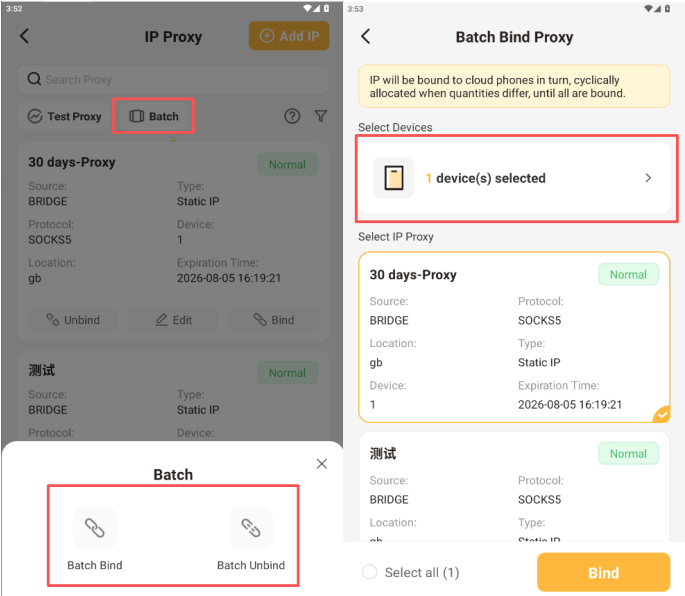
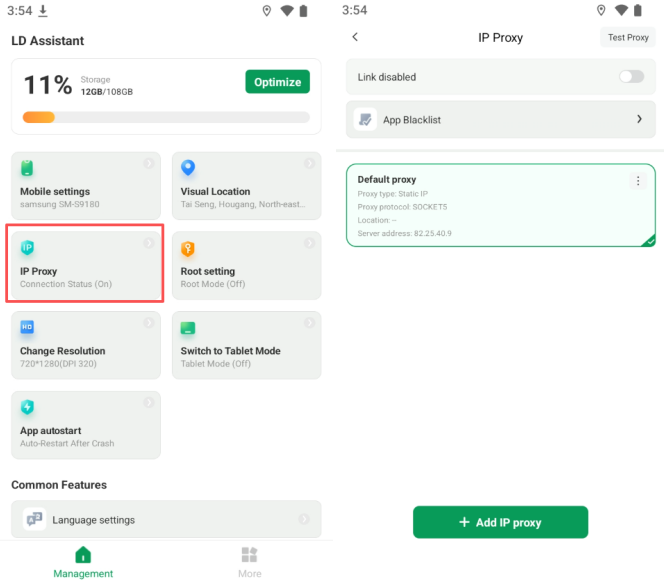
4:Check IP Proxy Operational Status After successful binding,
open the built-in LD Mobile Assistant inside your cloud device to view the active proxy IP status. If the IP management module is missing in the assistant, update LD Mobile Assistant to the latest version via the LDC App Store within the cloud device.