LDCloud
Recharge
SALE
English
How to purchase an IP proxy for LDCloud on PC
Update Time:2026-07-06 11:24:14
Purchase Steps
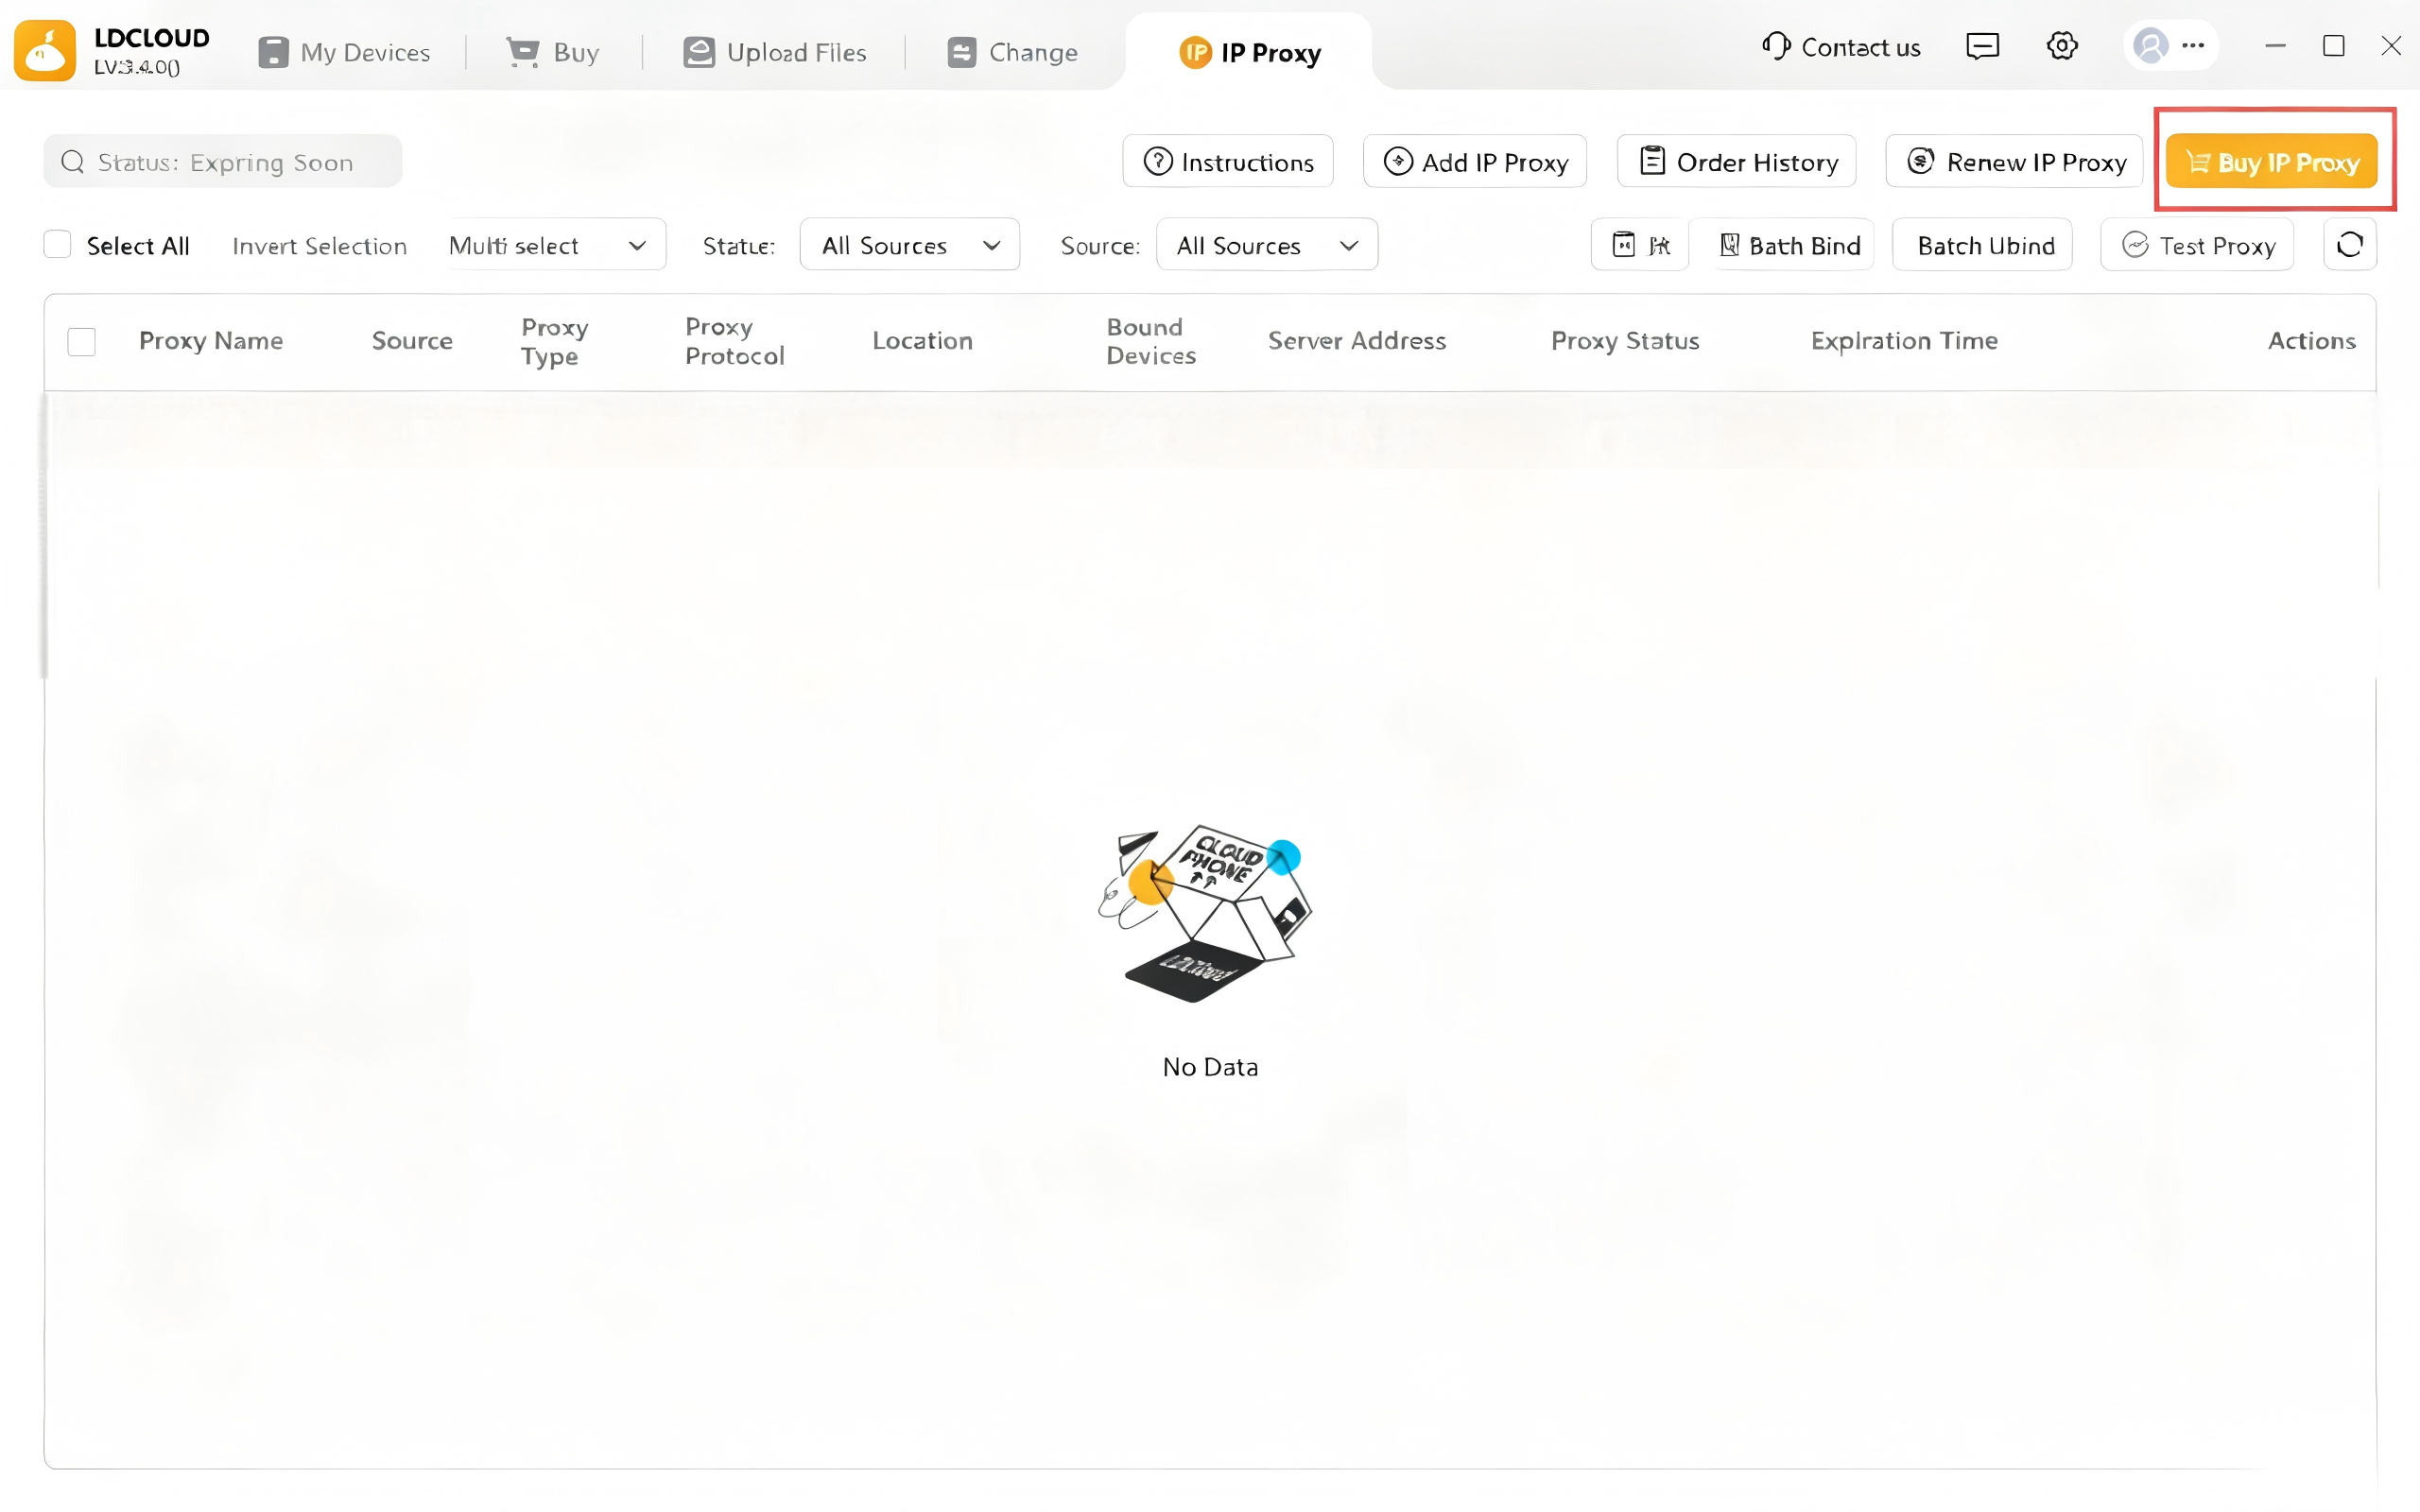
1:Launch the client, click IP Proxy at the top of the page to enter the corresponding feature page.
2:Click the Buy IP Proxy button at the top-right corner of the page.
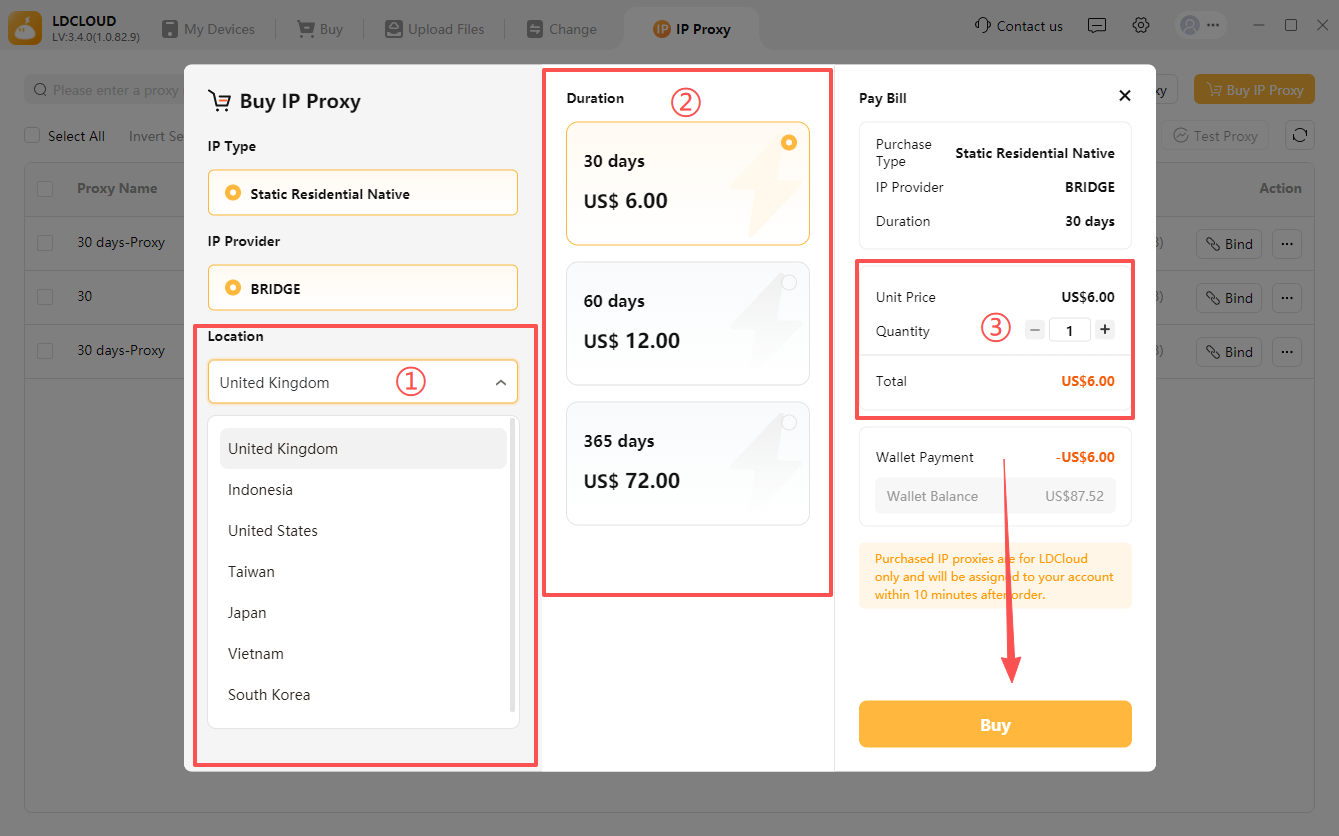
3:On the purchase page, complete the following selection steps:
①:Select the IP region
②:Choose the IP package duration
③:Set the IP proxy service period and the number of IPs to purchase (maximum 100 per order)
Submit your purchase once all three details are confirmed correct.
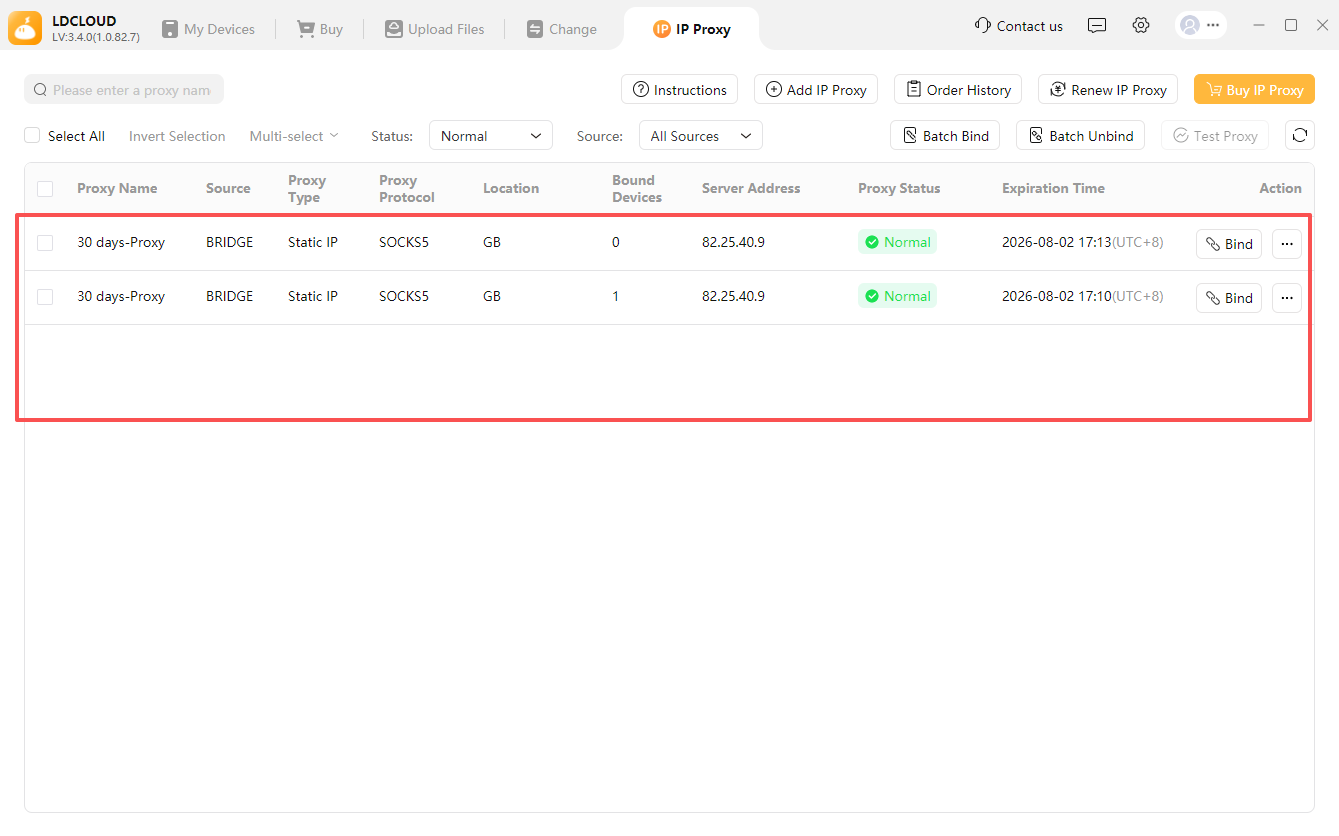
4:A Purchase Successful pop-up will appear. Wait briefly, then you can view your purchased IPs in the list
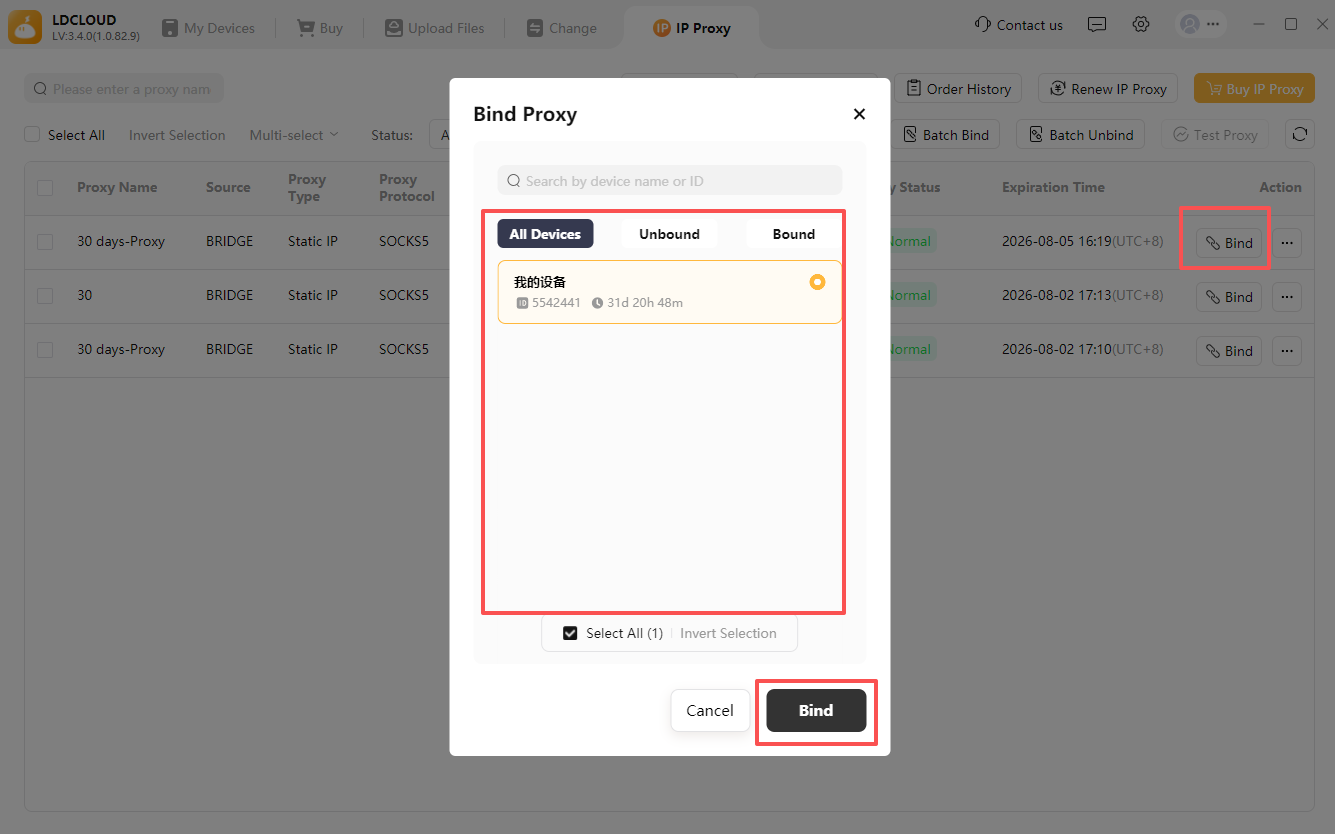
6. Steps to Bind Devices After Purchasing an IP
①:After purchasing the IP proxy, return to the IP Proxy page. A Bind button will appear on the right side of the corresponding IP.
②:Click Bind, check the target devices to be associated, then confirm and submit.
③:Wait for the page to finish
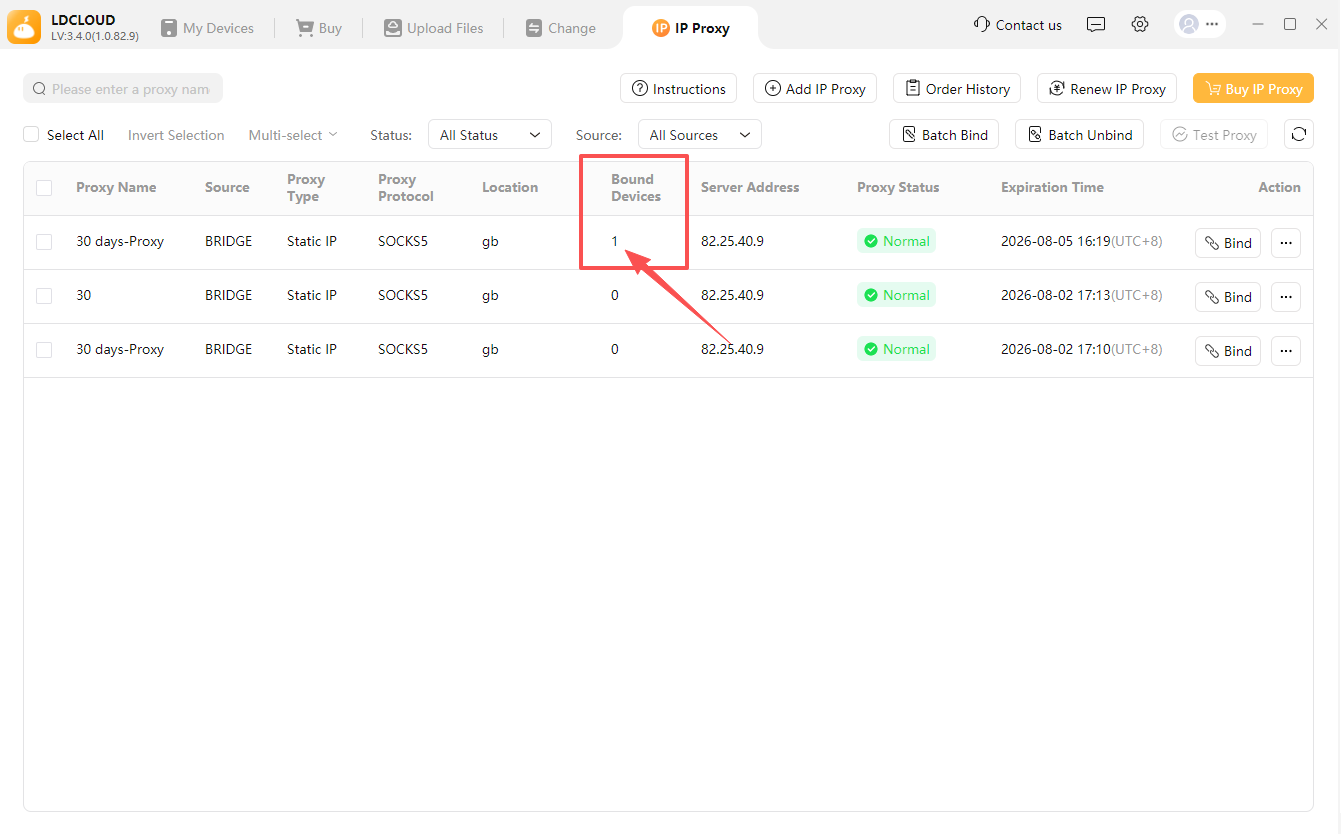
7. Check the Number of Devices Bound to an IP
After binding, you can view the total number of devices linked to this IP under the Bound Devices section in the IP details.
8. How to Verify That the Bound IP Works Properly Inside the Cloud Phone
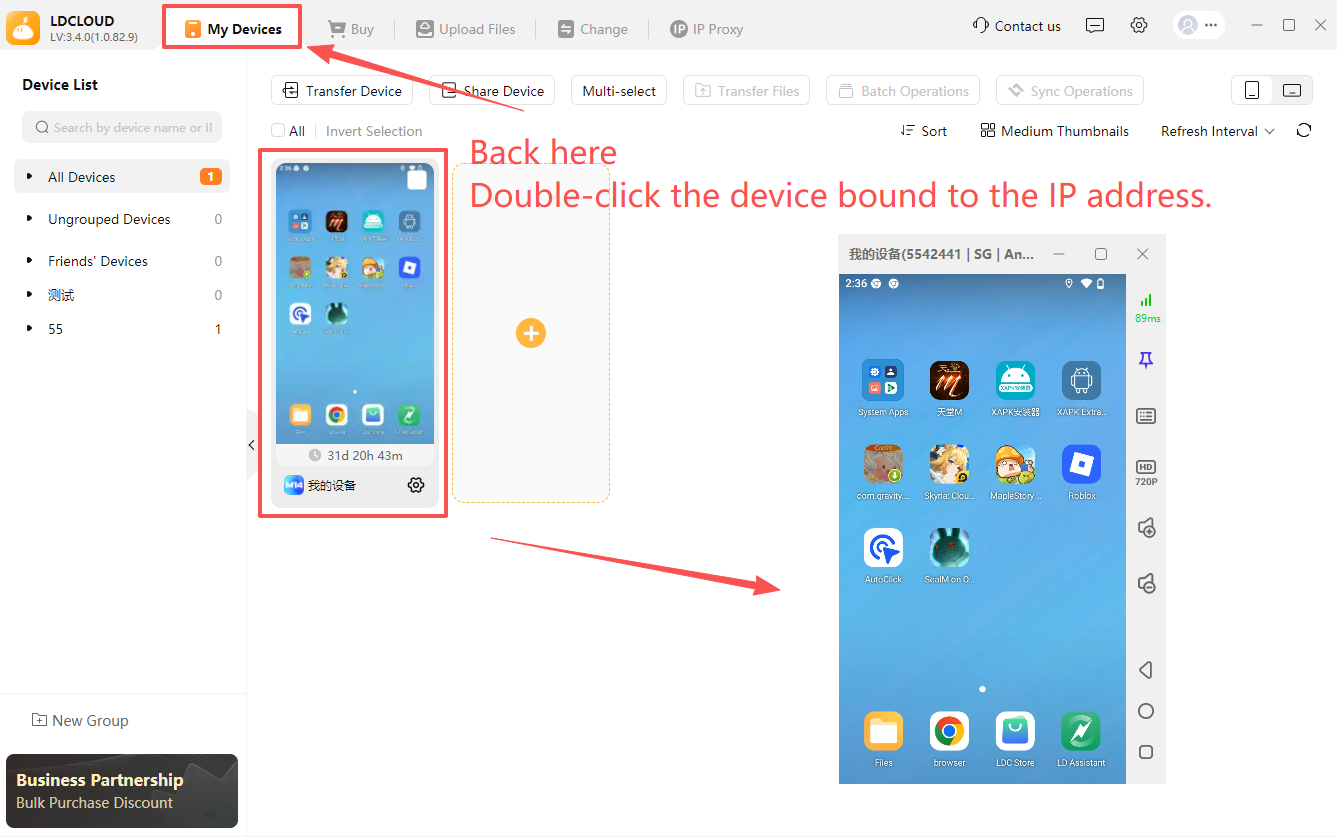
①:After finishing device binding on the IP Proxy page, go back to the My Devices page of the client.
②:Double-click the bound cloud device with the left mouse button to enter the device.
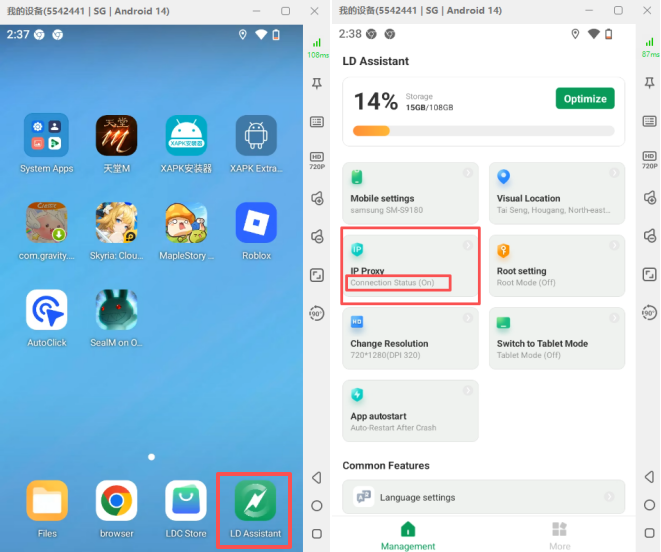
③:Open LD Cloud Phone Assistant in the bottom right corner of the device, navigate to the IP Proxy tab. A status showing On means the proxy is running normally.
Additional Notes: If the IP Proxy module cannot be found in the assistant, go to the built-in LDC App Store within the cloud device and update LD Cloud Phone Assistant to the latest version.
9:If you purchased the IP proxy yourself (through a third-party platform), please see the tutorial on how to add and bind it.
Mobile IP Binding: How to Bind an IP Proxy (Click to View Details)
PC IP Binding: How to Bind a PC IP Proxy (Click to View Details)