LDCloud
Recharge
SALE
English
How to purchase an IP proxy for LDCloud on your mobile phone
Update Time:2026-07-06 14:39:04
Purchase Steps
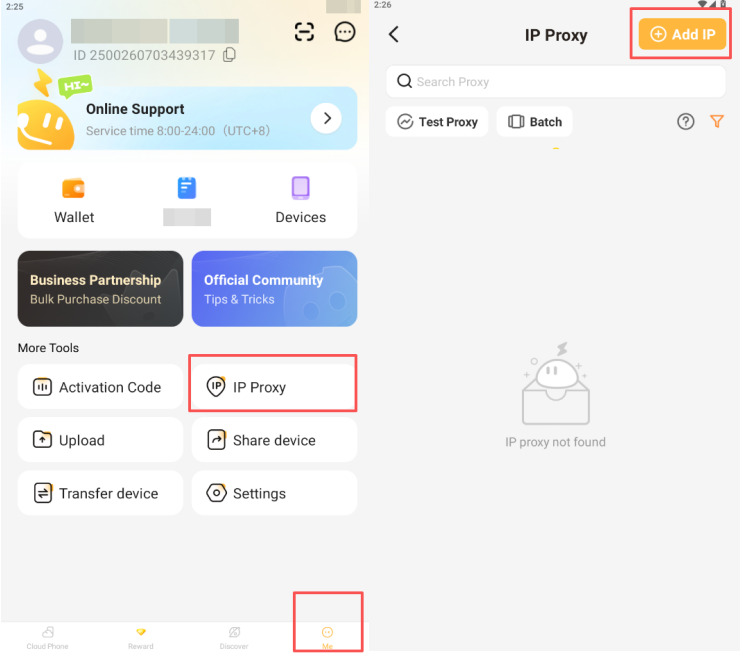
1:Launch the client, navigate to the My section, then locate IP Proxy.
2:After entering the IP Proxy page, click Add IP in the top-right corner and select Buy IP.
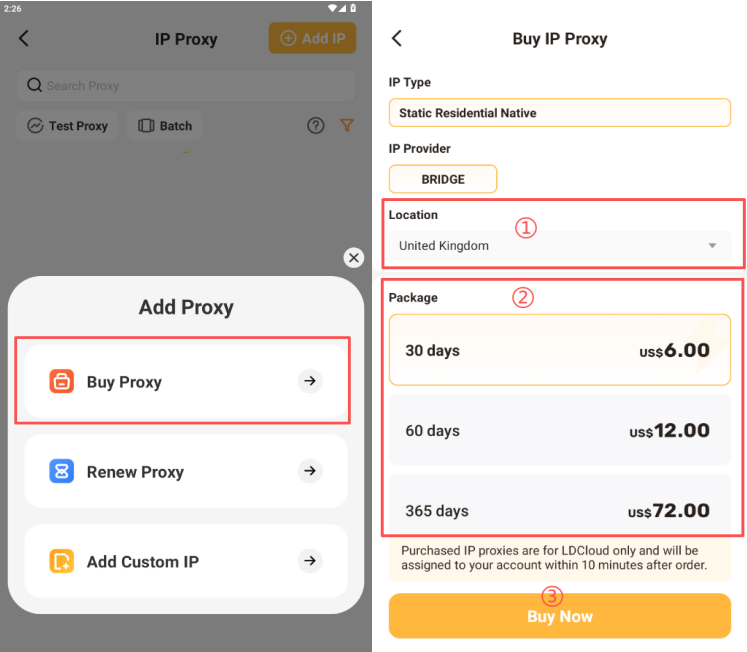
3:After entering the purchase page, follow these steps to select your plan:
① Choose the IP region
② Select the duration of your IP package
③ Confirm the IP proxy usage term and the number of IPs to purchase (maximum 100 per order)
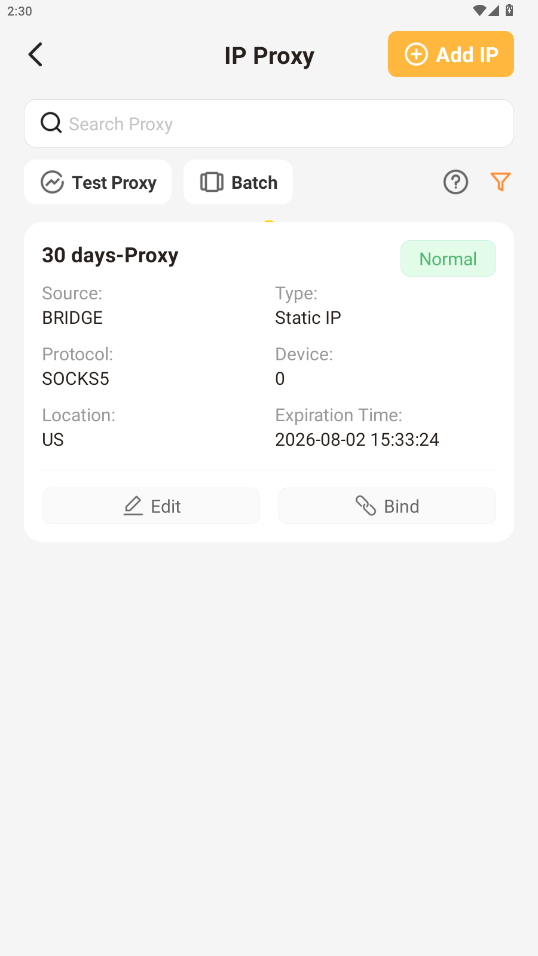
4:After confirming the purchase, you will be automatically redirected to the binding page, with a pop-up notification confirming successful purchase.
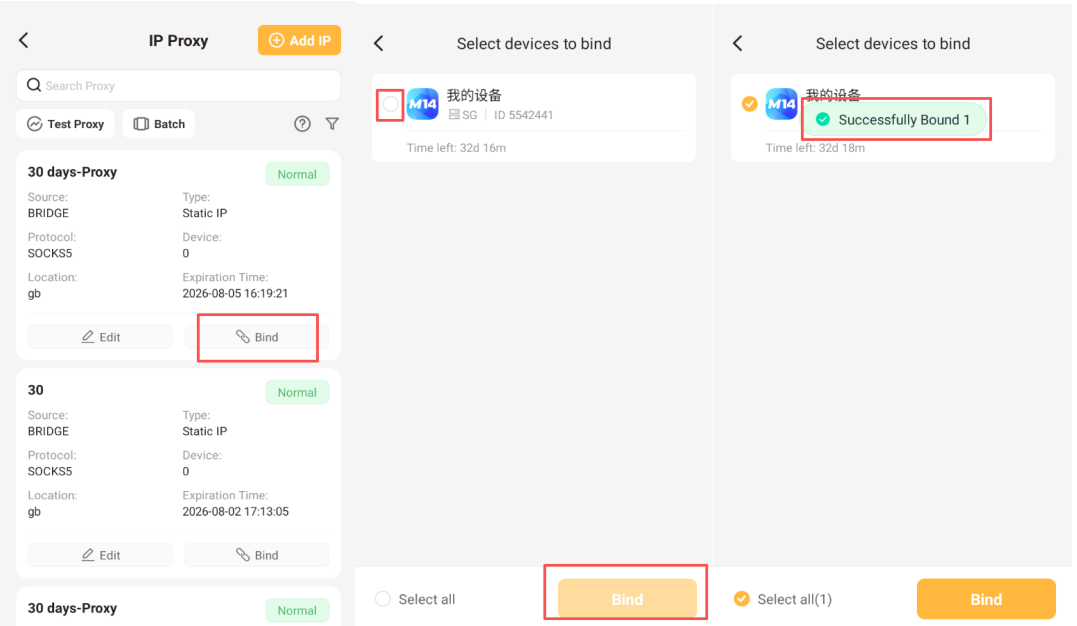
5. Next, we will walk you through how to bind IPs to your devices after purchase
Once your purchase is complete, return to the IP Proxy page.
Click Bind, tick the target cloud devices, then click Confirm and wait for loading. You’re all set once a binding success notification pops up.
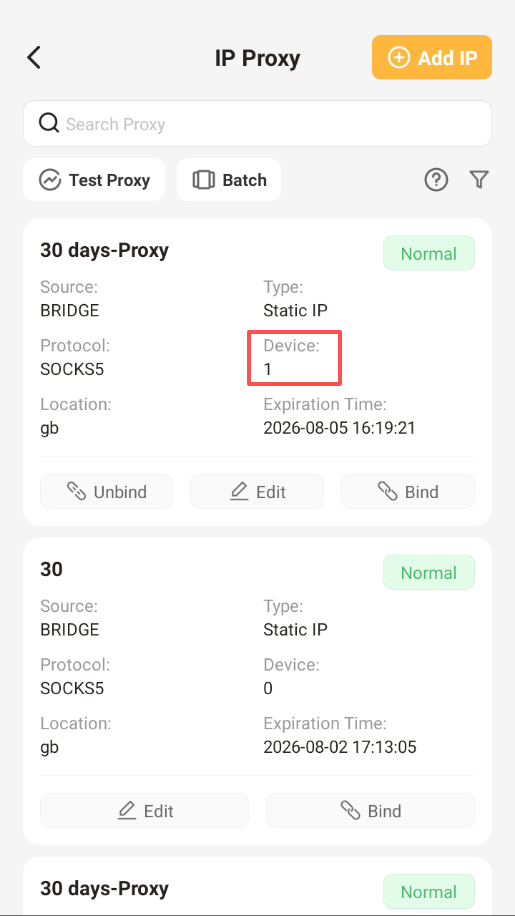
6. After binding, you can check how many devices the IP is linked to under the Devices tab on the IP Proxy page.
7. Check IP Proxy Running Status
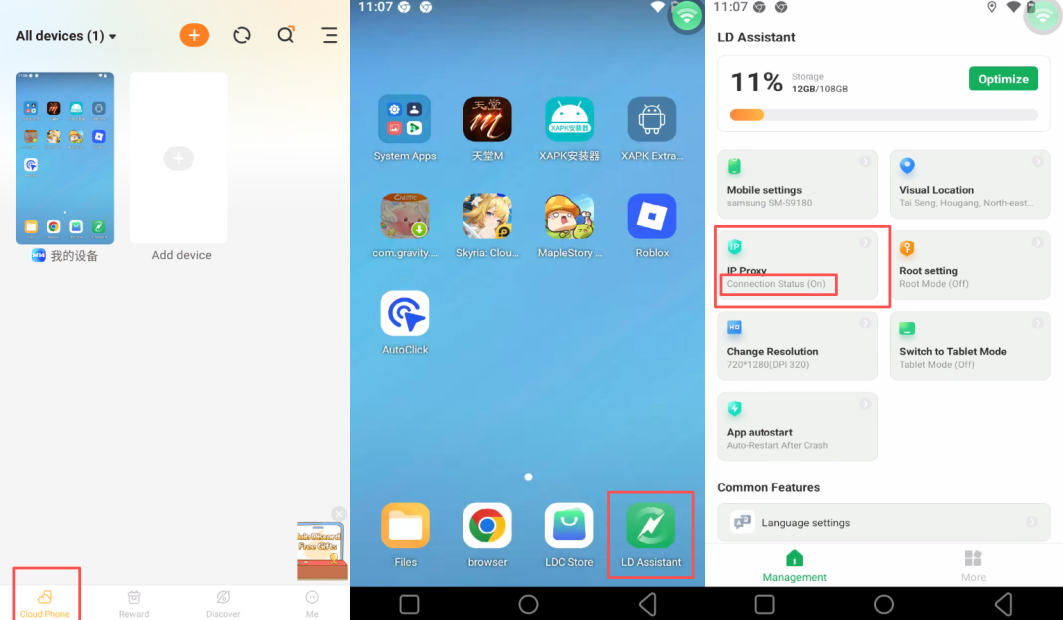
After successful IP binding, open the built-in LD Assistant inside your cloud phone to view the real-time running status of the proxy IP. If the IP management module is missing in the assistant, go to the LDC App Store within the cloud device and update LD Assistant to the latest version.
9:If you purchased the IP proxy yourself (through a third-party platform), please see the tutorial on how to add and bind it.
Mobile IP Binding: How to Bind an IP Proxy (Click to View Details)
PC IP Binding: How to Bind a PC IP Proxy (Click to View Details)